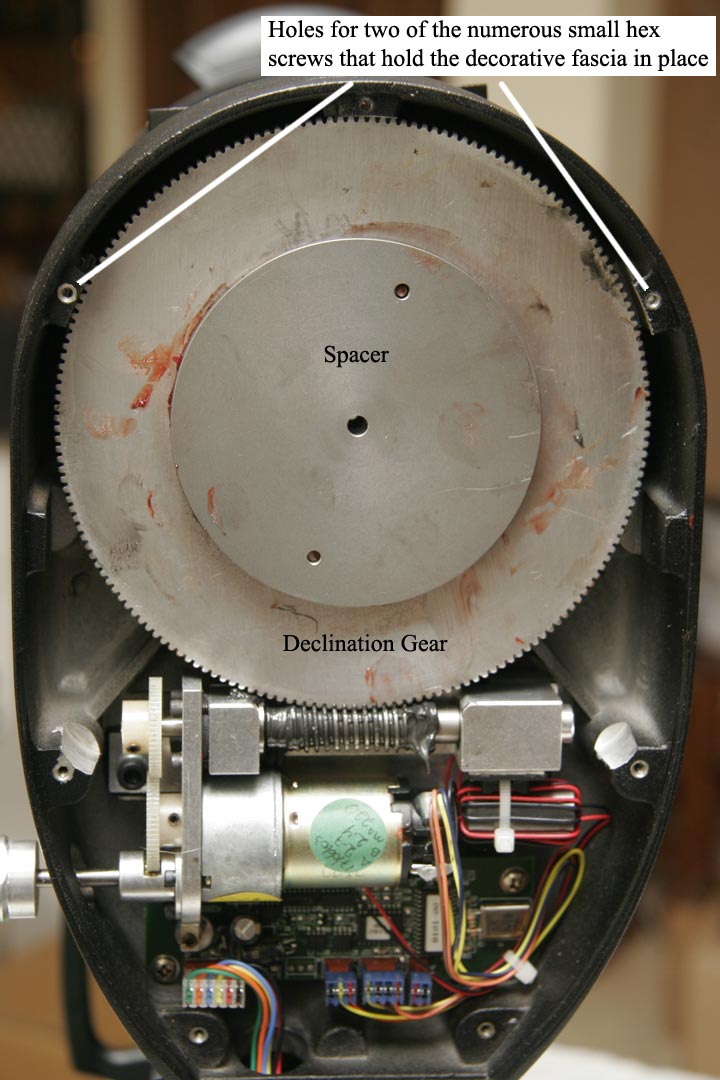
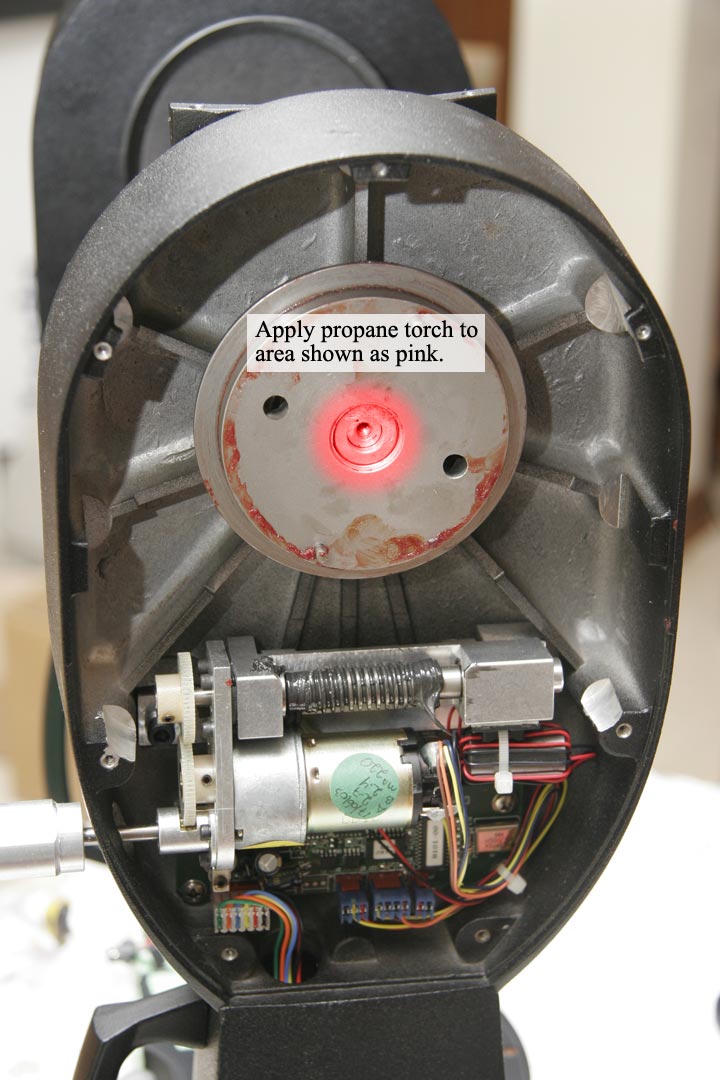
Above: Look at the plate whose center I have colored pink. The two holes that you see on either side of the center are designed to receive a special wrench called a spanner. If you don’t know what a spanner is, go to Sears.com and search in tools for spanner. Look at the Armstrong Face Spanner Wrench, Sears item #00999259000, Mfr. model #34-113. It has a span (get it?) of two inches and a pin diameter of 1/4 inch - exactly what is needed to fit this plate. (The retainer on the left fork arm requires a different spanner: 3/4" span with 1/8" pins. I couldn’t find one, so I made one.) Before proceeding further make certain that you have an assistant. The plate shown above is threaded onto the right declination shaft and the threads have been coated with an industrial-grade thread locking compound. You will probably not be able to remove the plate unless you melt the thread locking compound. Get out your propane torch - a heat gun is unsatisfactory for this application because it would spread heat over too wide an area. If you don’t have a propane torch, go to the home center and get one. Learn how to use it before you start this procedure. Learn, too, how to adjust it for the hottest flame, and where the hottest part of the flame is. (Hint: Yellow = cool, blue = hot.) Have your assistant hold the Optical Tube Assembly firmly to prevent it from rotating. Direct the hottest part of the flame at the area shown in pink above, and only to that area. Heating the plate-shaft joint for 90 seconds worked for me. Then quickly turn the torch off and put it in a safe location that you have prepared in advance, not too close to your work table, and away from flammable materials - its tip is very hot. Safety Warning: the plate and the center bolt are very hot! Still acting quickly, insert the spanner pins into the holes and turn counter-clockwise while your assistant prevents the OTA from turning. Do not allow the spanner to slip and damage the mechanical or electronic parts in this arm. Apply pressure until the plate loosens. If the plate does not loosen with considerable pressure, heat it again and apply the spanner again. It loosened for me on the first try, and the pressure required was not extreme. Loosen the plate with the spanner but do not remove it while it is hot. Take a break. When the plate and shaft have cooled you should be able to unscrew the plate with light hand pressure. Remove the plate and put it in another Ziploc bag. You will need to clean your hands again. You have completed the dissasembly of the right declination shaft. Do nothing further to the Right (West) fork arm. It is not necessary to loosen the arm where it meets the base of the mount. |