Primordial Light: INSTALLING A ROBOFOCUS
ON AN FSQ-106ED, August, 2009
 
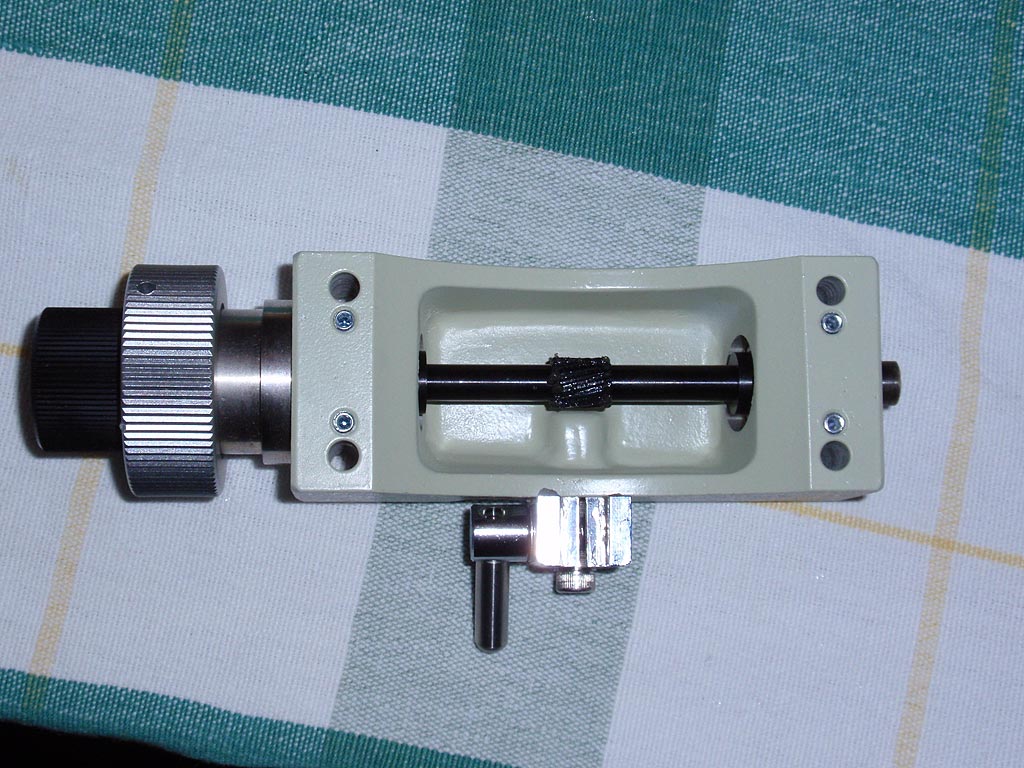
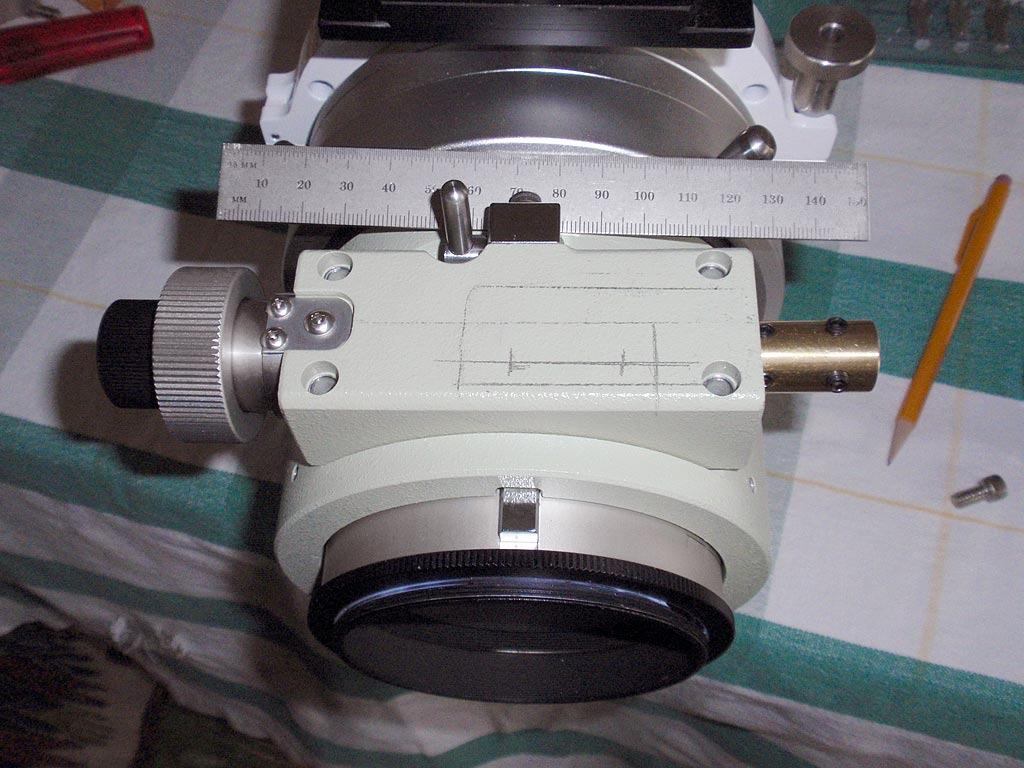
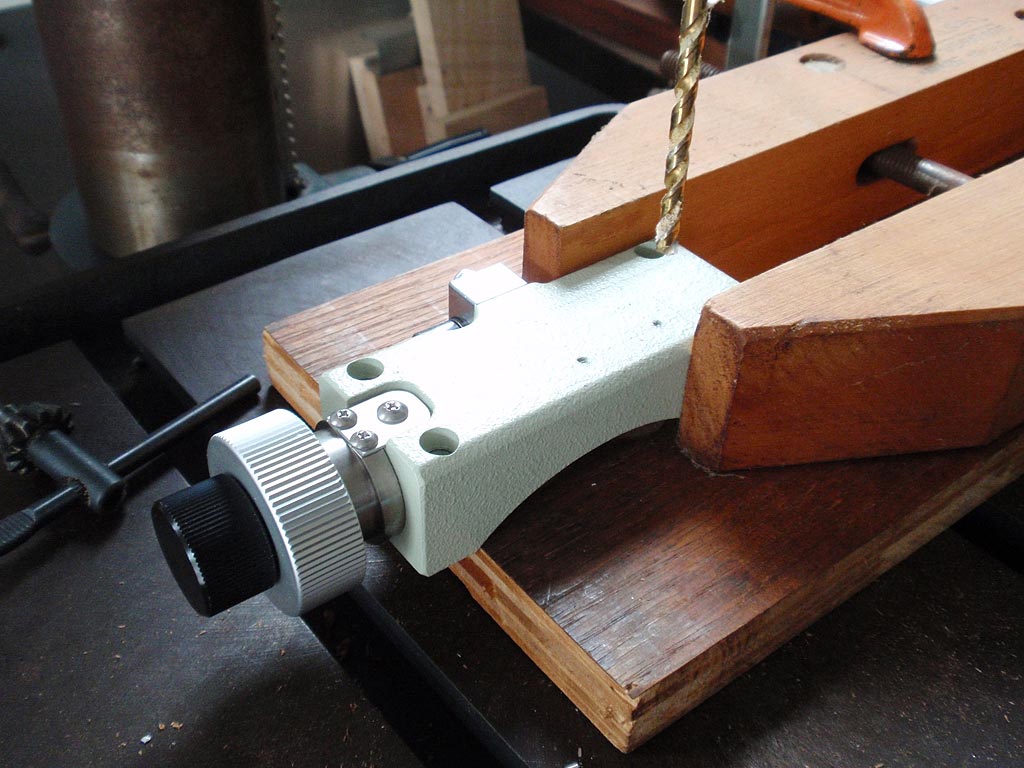
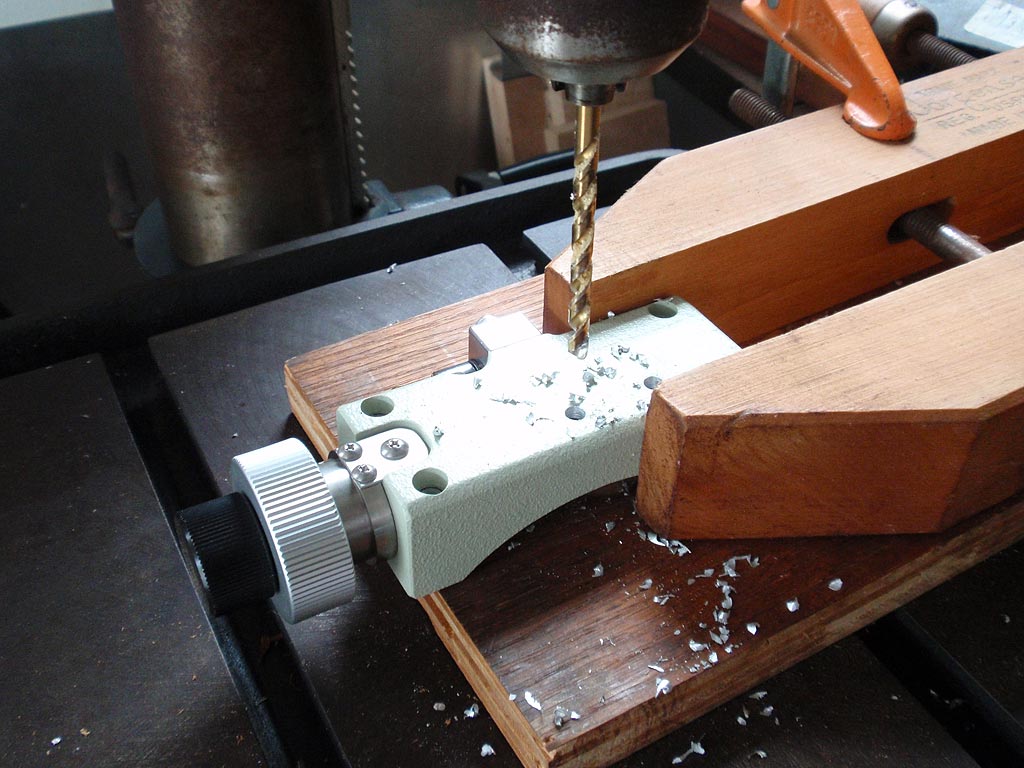
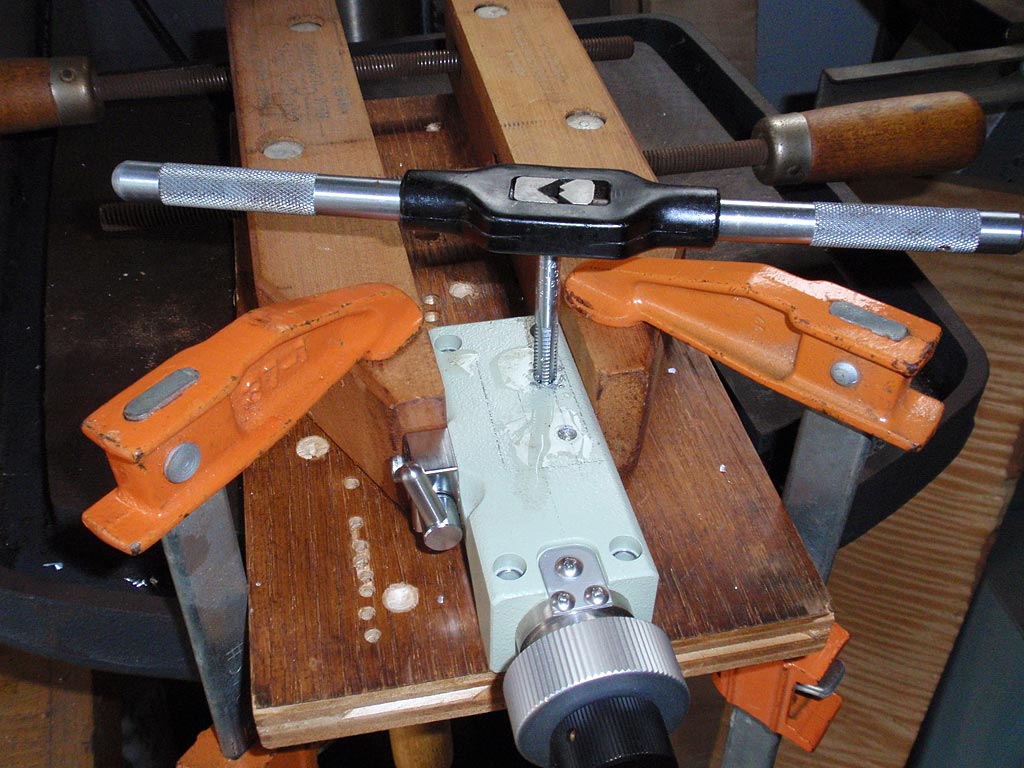
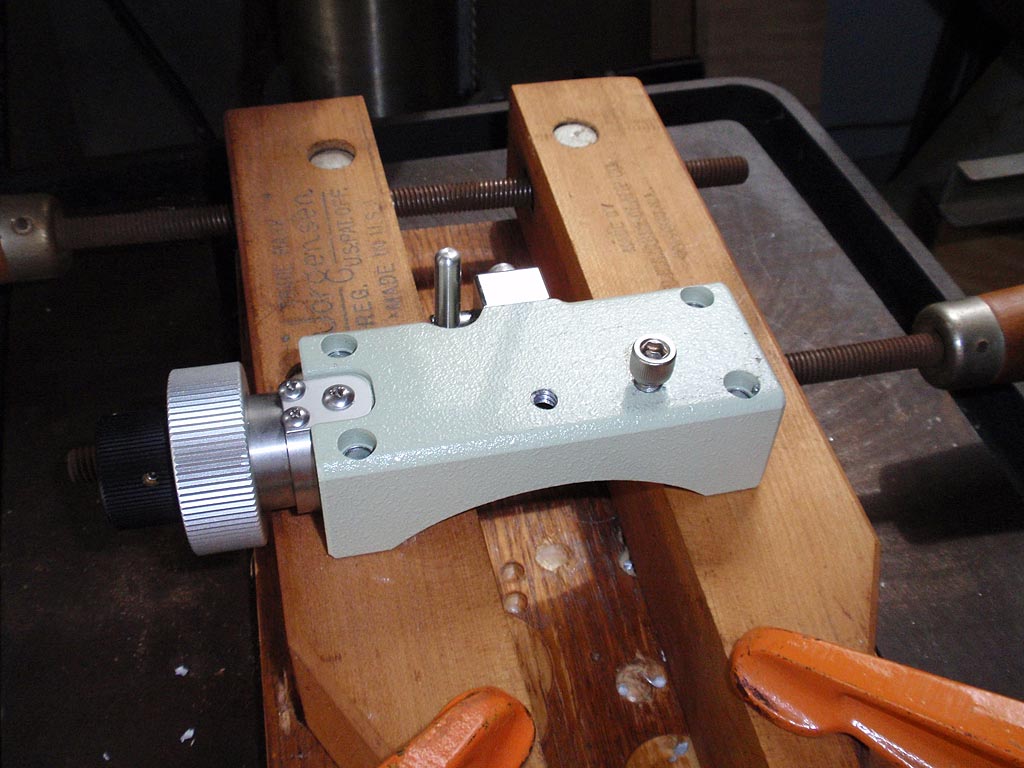
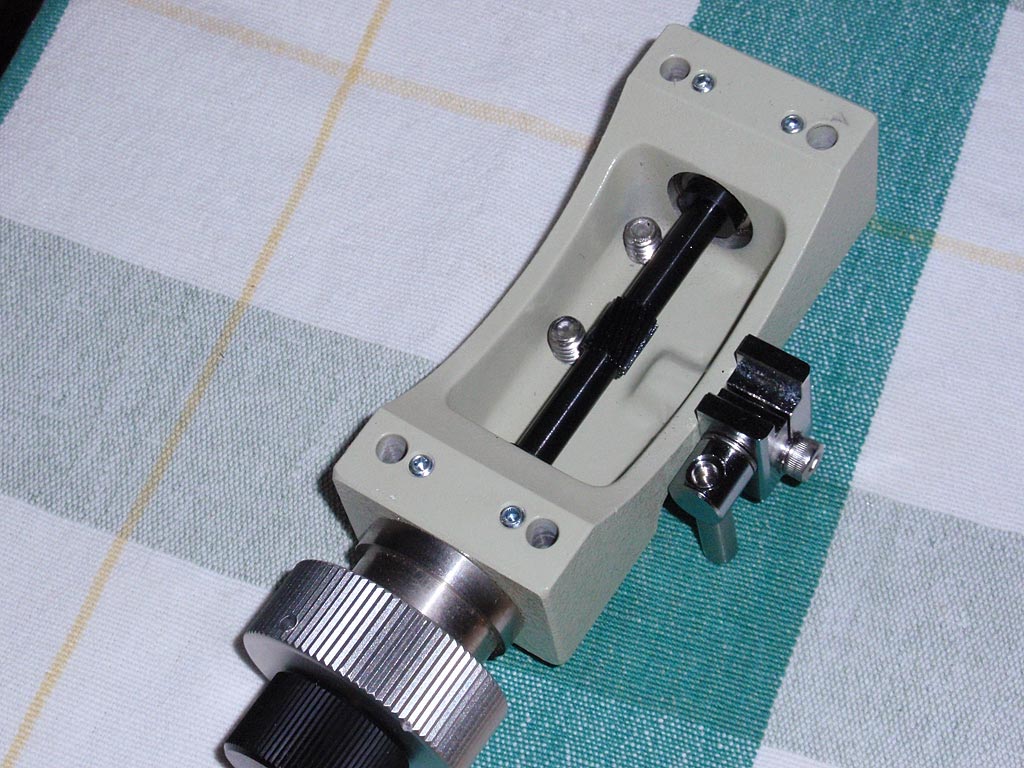
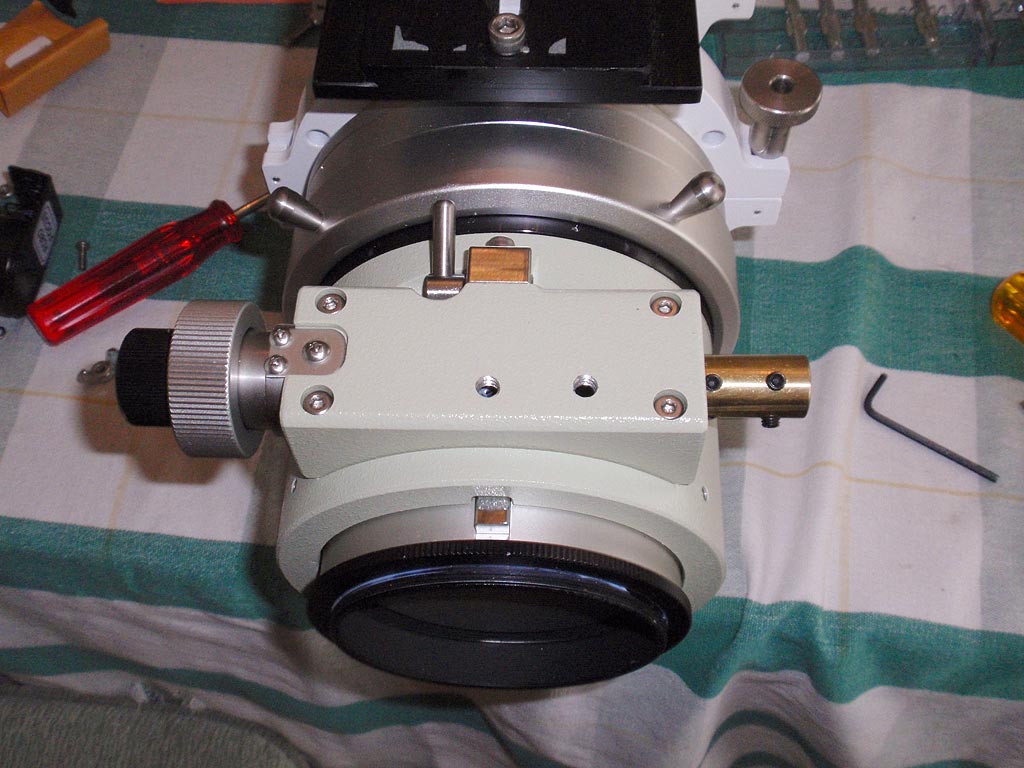
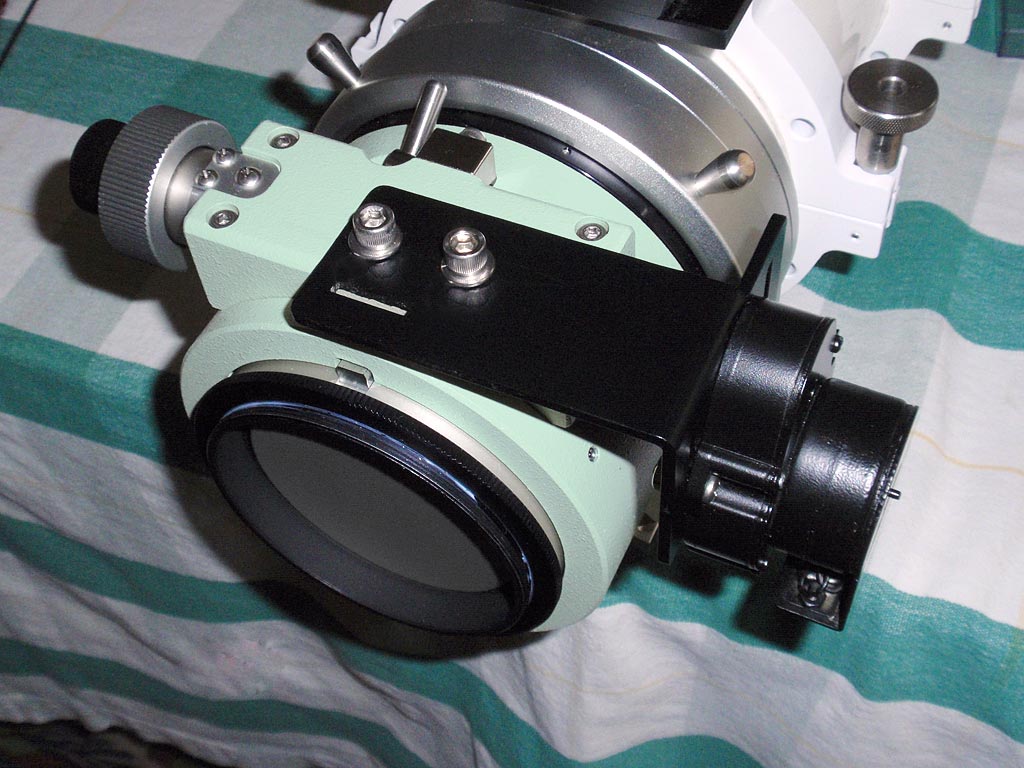
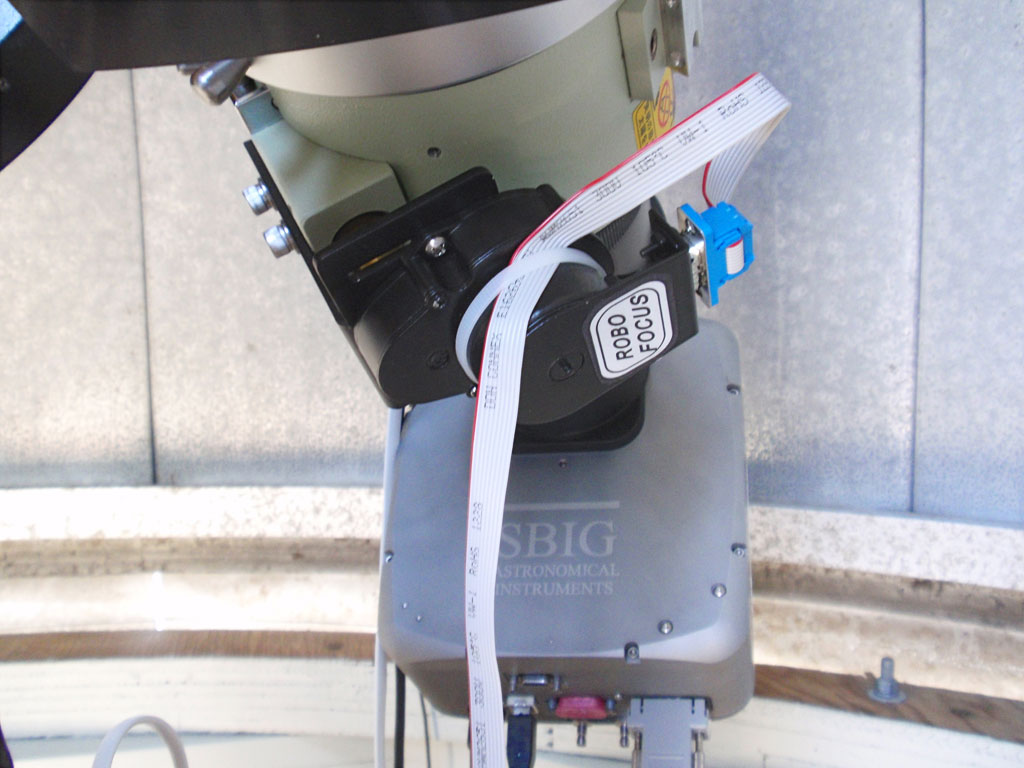
With a critical focus zone of 55 microns*, the FSQ-106ED is amenable to the use of a RoboFocus directly on the focuser shaft. After studying a number of FSQ-RoboFocus installations that may be found on the Web, I decided that none was right for me. Any bracket that attaches to the existing guide-’scope mount has a contrived appearance to me. I decided to drill holes in my FSQ - in the focuser-shaft housing, that is - and to modify a stock L-shaped black aluminum bracket as supplied by Technical Innovations. I am quite satisfied with my installation, as I find it to be aesthetically pleasing and more than sufficiently rigid. In use there is no detectable flexure in the focusing system. It is possible that a procedure analogous to the one I performed would work with other refractors as well.

Read the safety notice at the bottom of this page before attempting to perform this procedure yourself.
 
*This is in contrast to my Epsilon 180, which has a critical focus zone of only 17.25 microns, and which requires a timing gear reduction system for best results. Please see this page, on which I modeled my own Epsilon-RoboFocus installation. I commend this procedure to anyone who wishes to use a RoboFocus with a Tak Epsilon.   Critical Focus Zone in microns = the square of the focal ratio x 2.2. FSQ-106ED @ ƒ5: 25 X 2.2 = 55 microns.
Gray Line
Remove and Inspect the Pinion Gear Housing
pinion
Two 1/4" X 20 stainless-steel socket-head screws will hold the bracket to the focuser (or pinion-gear) housing. It is necessary to remove the housing in order to find suitable locations for the screw holes so that they will clear the side of the housing but will not touch the pinion gear or the pinion shaft. One must use stainless steel screws; galvanized or black-coated screws will rust in this application.
Gray Line
Mark the positions of the threaded holes.
layout
Based on measurements taken with the pinion housing inverted, I marked the location for two holes to be drilled and tapped. Note that the RoboFocus coupling shaft is already in place. It was necessary to install the RoboFocus and the bracket and hold it in place by hand in order to mark the focuser housing. I happen to have laid the ruler in that location before I made this photo. Its position in the photo does not relate to any layout elements.
Gray Line
Nervous?
drill 1
Now we're getting to the scary part. I'm a woodworker, not a metal worker, and I don't have the precision machines that machine shops have. Nonetheless, I was able to accurately punch dimples in the focuser housing (to force the drill bit to enter at the correct position). I also used a contrivance of wood clamps to secure the work piece tightly. Securing the work piece is very important in all drilling, but particularly so when drilling metal. Even a relatively small piece of metal such as this focuser housing is a very dangerous thing if the drill bit sticks and causes it to begin spinning at 500 revolutions per minute. It is necessary to remove the clamps, move the work piece, and re-secure it in order to drill the second hole. Note that the work piece rests on a well-worn scrap of plywood so that the drill bit does not meet the drill-press table if the bit goes too deep.
Gray Line
Success
drill 2

Showing again that I am not a machinist, I did not know what size bit to use - only that it had to be smaller than 1/4". I selected my next-smallest size, a 7/32" bit, and it worked just fine. The focuser housing is made of soft aluminum and it is not difficult to drill, but one must take small bites rather than bore right through because the bit will overheat and the hole will not be clean. See your drill-press manual for the proper speed. I used 450 rpm for mild aluminum. After drilling it is necessary to carefully clean the small aluminum chips out of the inside of the focuser housing so that they do not become trapped between the pinion and the rack. I used a couple of old paint brushes and compressed air to clear the chips away. Not shown: I used a small steel machinist’s square to check that the drill bit was perpendicular to the focuser housing.

Gray Line
Cutting the threads is easier than you might think.
tapping

Secure the work piece tightly again so that you can use both hands on the tap handle. Hold the tap as nearly perpendicular to the housing as you can as you press down fairly hard and turn the tap clockwise. When the tap begins to bite, the downward pressure is no longer necessary, as the tap pulls itself into the hole as you turn it and it cuts the threads. If you were not holding the tap perfectly vertical at the very beginning (and you probably weren't) that is not a problem because it will straighten itself since it must follow the hole. As with the drill, you proceed with small bites. Each time you go inward a small amount, reverse the tap slightly to pull the chips out and make the cut smoother. Then turn forward (inward) again and repeat until the tap is through the piece. The tap signals that it has gone completely through at full width by becoming very easy to turn and it is no longer subject to wobbling. At that point I removed the focuser housing from the clamp and held it in one hand while gently reversing the threading process. I turned the tap outward about one turn and then back inward a very small amount and repeated until the tap came out of the threaded hole. The result was a very smooth and properly sized threaded hole. The liquid on the top of the focuser housing in the photo above is light machine oil that is used to make the tap work more easily. Thanks to my neighbor, John Perry, for lending me his tap and die set. I have a beautiful antique set (very early 20th century) that works just fine, but I didn’t want to risk a tool failure with this job.

Gray Line
A Nice Job
nice fit

The completed holes with one 1/4" X 20 socket-head screw partially screwed in. The proof of the pudding is that the screw may be inserted fully by hand, but it has no wobble.

Gray Line
Ample Clearance
clearance

Looking at the housing with the screws tightened all the way down shows that there is plenty of clearance. The bottom-most screw is not at all close to the pinion gear; any appearance to the contrary is an illusion resulting from the camera angle.

Gray Line
The Focuser Housing Re-Attached
focuser on

The focuser housing re-attached to the tube. I had cleaned the focuser housing with mineral spirits to remove the oil and the pencil marks, so I put a small amount of Genie garage-door-opener grease on the rack and pinion gears. This grease does not harden in cold weather, at least down to about 0° F (-18° C). In case you ever need this information, the size of the four stainless-steel socket-head bolts that secure the focuser housing to the tube is M4-.70 X 40. This is a metric size. Be certain that you have a metric hex key and not an English size that “sort of fits” when you are working with metric socket-head screws.

Gray Line
Satisfaction!
finished

I will not tell a lie. On my first attempt I drilled both holes in the bracket in the wrong place. This surprised me, because I am experienced at measuring work pieces (wood, usually) and transferring those measurements to another piece that is to be fitted to the first piece - and I usually get it right. No matter; a bit of re-drilling and it worked just fine. It is necessary to make the holes in the bracket slightly larger than 1/4" anyway, because once the motor is secured to the coupler shaft and to the bracket it is not possible to move the bracket to compensate for any slight misalignment between the threaded holes that you made in the focuser housing and the holes that you drilled in the bracket.Of course, if you have precision machine tools (as opposed to the wood-working tools that I use) with which to do this procedure, you will be able to achieve greater precision than I achieved. I used stainless-steel flat washers and lock washers on the socket-head screws. One should always use lock washers in such an application. I also coated the 1/4" X 20 stainless steel screws with very light grease (Genie garage-door-opener grease) because the aluminum threads can corrode in certain circumstances.

Gray Line
At Work
withcamera

Mounted and ready to go. Be certain that you loosen the focus-lock or the RoboFocus will not move the focus tube! The RoboFocus is now your focus-lock. Please note the white cable tie that is attached to the motor housing and that acts as a strain relief for the serial ribbon cable. Some kind of strain relief is necessary because the ribbon cable is likely to fail at the connector if it is permitted to flex at that point during mount movement.


Update September, 2015
After considerable use over six years, this installation continues to perform flawlessly.
It has not required adjustment, tightening, or any other maintenance.

Gray Line
Proof
m71test

The rich star field in this wide view of the globular cluster M71 in Sagitta is in sharp focus.

STL-11000M, Luminance only.

Gray Line
Please Read This!

Working with power tools, whether with wood or metal, is inherently dangerous. That means that working with power tools cannot be made safe, though the risk of injury may reduced to a low level if safety precautions are observed. If you are unaccustomed to reading operating manuals, make an exception for the manuals that came with your power tools. No matter how experienced you are, accidents may happen. Failure to wear OSHA-approved eye and ear protection is foolishness, not manliness. If you wish to perform this procedure but do not have the proper tools or do not feel competent to do so, you should at least be able to remove the focuser housing - a trivial task requiring only a metric hex wrench of the proper size - and take it, along with your bracket and RoboFocus motor to a machine shop and have them perform this work. Be sure to take your 1/4" X 20 socket-head screws and the attachment hardware (screws, washers, and shaft coupler) that came with your RoboFocus.

Not shown here: Although I have a bit of experience in drilling and tapping soft metals, before I undertook this task I successfully drilled and tapped a scrap piece of 1/4" thick aluminum to practice and gain confidence.